How To Clean Water Inlet Valve On Washing Machine
Stop Messing Around. How To Clean Water Inlet Valve On Washing Machine. Now.
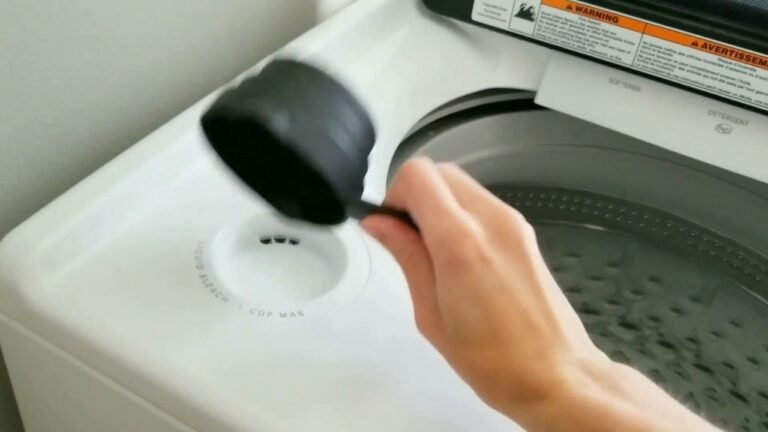
Look. Your washing machine’s taking its sweet time filling. Or maybe it’s not filling at all. Don’t panic. Usually, it’s not some catastrophic electronic failure. It’s probably just a clogged water inlet valve. Yeah, that little guy. The thing is, most people just call a repair guy. Waste of money. Honestly, you can handle this. This ain’t rocket surgery.
I remember a few years back. My old Kenmore. Suddenly, it decided washing clothes was optional. Took forever to fill. I’m standing there, staring at it, furious. Thinking ’bout all the money I’d shelled out for that thing. Then I remembered my dad. He used to fix everything. Said ‘If you can’t fix it, you bought the wrong thing.’ So I popped the hood. Found the valve. Caked with gunk. A quick clean, and boom. Back in business. Saved myself a hundred bucks. Maybe more.
Watch: Washing machine takes forever to fill with water – Clogged …
This isn’t some high-tech operation. It’s basic. Grimy. Necessary. If you’re goa keep your appliance humming, you gotta do this maintenance. It ain’t glamorous. Nobody throws a party for it. But it works. And it saves you cash. Plenty of cash.
Why Your Washer’s Being A Slacker: The Valve Problem
The water inlet valve is the gatekeeper. It controls when water enters your washer. And how much. Simple enough. When it gets clogged with sediment, minerals, or gunk, it restricts flow. Or stops it dead. The thing is, water ain’t pure. Tap water? It’s full of crap. Minerals. Little bits of rust. Everything. This stuff builds up over time. Like plaque in your arteries. Eventually, it chokes the valve.
Think about it. If the valve can’t open right, the sensors get confused. The machine thinks there’s no water. So it waits. Or it throws an error code. Frustrating? You bet. But fixable. This guide? It’s goa walk you through it. Step-by-step. No BS.
What You Need To Not Screw This Up
Alright, let’s get down to brass tacks. You need tools. Don’t be a hero. Go get this stuff. You probably have half of it already. If not, hit up the hardware store. It’s not expensive.
Essential Tools and Supplies
- Screwdriver Set: Phillips head is usually your friend here. Maybe a flathead too.
- Pliers: Needle-nose are handy for grabbing small bits. Regular pliers work too.
- Adjustable Wrench: For those stubborn hose coections.
- Bucket or Towels: To catch residual water. Trust me, there will be water.
- Old Toothbrush or Small Brush: For scrubbing out the valve.
- Vinegar or Lime-Away: A mild descaler. Your weapon against mineral buildup.
- Gloves: Keep your hands clean. Or, you know, less dirty.
- Camera/Phone: Take pictures as you go. Seriously. Document your work.
Safety First, You Idiot
Before you even THINK about touching your washer, you gotta kill the power. Unplug that thing. From the wall. Don’t just switch it off. Unplug it. Then, you gotta shut off the water supply. Find those shut-off valves behind the machine. Turn ’em clockwise. All the way. If you skip this? You’re goa have a bad time. Water everywhere. Maybe electrocution. Don’t be that guy.
Accessing the Beast: Getting To The Valve
Okay, power and water off? Good. Now we gotta get to the valve. This is where it varies. Most top-loaders? You’ll probably need to remove the back panel or the front panel. Front-loaders? Usually the back panel. Some models have an access panel. Consult your manual. If you lost it? Google your model number. It’s not hard.
Take pictures. I said it again. When you remove screws, put ’em in a safe place. Maybe label where they came from. Trust me on this. Reassembly is a bitch if you don’t know where things go.
Removing the Panel: A Delicate Dance
Unscrew the necessary panels. Be gentle. Don’t force anything. If it’s stuck, there’s probably a hidden clip or screw. Feel around. Check the edges. Once the panel’s off, you’ll see the guts. Find the hoses coming from the wall. They coect to the water inlet valve. It’s usually a plastic thing. Mounted near the top back of the machine. It’ll have wires attached to it. And the water hoses.
Watch: How to clean a washing machine water inlet valve filter.
I once worked on a friend’s Maytag. Panel was a nightmare. Took me twenty minutes just to get the damn thing off. Turns out, there was a tiny clip hidden under the top lip. If I’d just RUSHED it, I’d have broken something. Patience, man. It pays off.
The Main Event: Cleaning That Gunked-Up Valve
Alright, you’ve found the valve. Now the real work. We gotta discoect the hoses. And the electrical coectors. Take another picture. Seriously. These coectors just pull off. Usually. Sometimes they have a little tab you need to press.
Discoecting the Hoses
The hoses that coect to the valve? They might be threaded on. Use your adjustable wrench. Or they might be clamped. In that case, you need pliers to loosen the clamp. Then slide it back. Then wiggle the hose off. Be ready for a little water to drip out. That’s what the bucket or towels are for. Don’t spill it everywhere. Your significant other will NOT be happy.
Remember that one time I tried to replace a dryer belt? Got halfway through, realized I needed a special socket. Tore the whole damn machine apart for nothing. Ended up putting it back together. Ordered the socket. Then took it apart AGAIN. Don’t be me. Have the right tools. And discoect everything properly.
Removing the Valve (Sometimes Necessary)
Now, some valves are mounted with screws. If yours is, unscrew it. Careful. There might be a gasket. Don’t lose it. If it’s just clamped in place, you might be able to clean it without removing it fully. But removing it? Gives you better access. Honestly, it’s usually worth the extra five minutes.

The valve itself is typically plastic. It’ll have a solenoid attached. That’s the part that opens and closes. The intake screens are usually right where the water hoses coect. Sometimes they’re built-in. Sometimes they’re separate little mesh filters.
The Deep Clean: Scrubbing Away the Grime
Once the valve is out, or you have good access to the inlet screens, it’s time to clean. Use your old toothbrush. Dip it in vinegar or a descaling solution. Scrub those screens. Get into every nook and cray. If the valve is really bad, you might need to soak it. For an hour or two. In vinegar.
Look at the gunk. It’s disgusting, right? All that stuff that was slowing down your wash. You’re basically giving your washer a spa treatment. A really cheap, dirty spa treatment. Rinse it thoroughly with clean water after scrubbing. Make sure all the descaler is gone.
My neighbor’s machine was ancient. Water barely trickled in. He was ready to buy a new one. Cost him like $800. I told him, ‘Let me look.’ Took me an hour. Cleaned the valve screens. Turns out they were completely blocked. Like, solid. He owes me beer for life. And he didn’t buy a new machine.
Reassembly: Putting It Back Together Right
Cleaning’s done. Now, reverse the process. Sounds simple, right? It is. If you took notes. Or pictures.
Putting It All Back
Reattach the valve if you removed it. Make sure any gasket is seated correctly. Coect the water hoses. Tighten them securely, but don’t overtighten. You’ll crack the plastic. Recoect the electrical coectors. Make sure they click into place. Slide the panel back on. Screw everything back together. Double-check that you didn’t leave any tools inside. Seriously. I’ve done it. Sparks fly. Bad news.

If you removed a clamp, slide it back into position and secure it. If you threaded hoses, ensure they’re on straight. The thing is, a good seal is critical. Leaks are aoying. And potentially damaging.
The Moment of Truth: Testing Your Work
Okay, deep breaths. Power back on. Water supply valves open. Slowly. Watch for leaks around the hose coections. Now, run your washer. On a quick cycle. Like a rinse cycle. Watch the water fill. Is it fast? Is it steady? Does it fill completely? If yes? Congratulations. You did it. You fixed your own damn washing machine.
Watch: Cleaning the water inlet valve (removing and cleaning the …
If it’s still slow? Or not filling? Go back. Check your coections. Did a hose get kinked? Is the valve not opening fully? Maybe the valve itself is shot. If you’re still having issues, then maybe it’s time to consider professional help. Or a new machine. But give it this cleaning first. Most of the time, that’s all it needs.
Troubleshooting Common Issues After Cleaning
So, you cleaned it. It’s still acting up? Don’t get discouraged. This stuff happens. Let’s look at what else could be wrong.
Slow Fill Continues
If the fill is still sluggish, double-check those screens. Did you miss a spot? Is there a blockage further up the line? Check your home’s main water supply. Is it weak? Sometimes the issue isn’t the washer at all. To be fair, it’s rare, but it happens.
Leaks Persist
Leaks usually mean a bad coection. Or a damaged hose. Or a cracked valve. Ensure all clamps are tight. If the threads on the hose or valve are damaged, you might need to replace the hose or the valve entirely. A small leak can turn into a flood. Don’t ignore it.
Washer Won’t Fill At All
If it’s dead empty, it could be the water inlet valve solenoid failed. Or the wiring to it is bad. Or the machine’s control board isn’t sending the signal. This is where it gets more complex. If cleaning didn’t fix it, and you’ve checked the obvious, it might be time for a pro. Or a new washer. That’s the gamble.

Preventative Maintenance: Keeping Your Valve Clean
How do you stop this headache from coming back? Simple. Regular maintenance. Don’t wait until your washer is practically a decorative garden feature.
Regular Flushing
Every six months or so, run a hot wash cycle with a cup of vinegar or a descaling solution. This helps break down any buildup before it becomes a problem. It’s like flossing for your washing machine. Cheap insurance.
Water Filter Check (If Applicable)
Some homes have whole-house water filters. Make sure yours is clean and functioning. A clogged house filter means more junk getting into everything, including your washer.
Inspect Hoses Periodically
Check your water hoses every year. Look for cracks, bulges, or signs of wear. Replace them every 5 years, whether they look bad or not. Burst hoses are a disaster waiting to happen. Seriously. I know a guy whose basement flooded. Ruined his furnace. All from a cheap rubber hose.
The Final Word: You Can Do This
So there you have it. How to clean the water inlet valve on your washing machine. It’s not difficult. It’s messy. It’s satisfying. You saved yourself money. You learned something. And your clothes will get washed. Mission accomplished. Go pat yourself on the back. Just don’t drip oil on the clean floor.
Frequently Asked Questions
How often should I clean my washing machine’s water inlet valve?
Honestly, it depends on your water quality. If you have hard water, you might need to do it every 6-12 months. If your water is soft, maybe every 1-2 years. Look for signs like slow filling first.
Can I use CLR or a stronger cleaner on the valve?
It’s best to stick with vinegar or a milder descaler like Lime-Away. Stronger chemicals can damage the plastic or rubber parts of the valve. Gentle is usually better here. You don’t want to create new problems.
What if my washing machine has an electronic water inlet valve?
Most water inlet valves are electronic (solenoids). The cleaning process described here applies to those. The solenoid itself usually isn’t cleaned, but the screens where the water enters it are. If the solenoid is bad, you replace the whole valve unit.
My washer still leaks after cleaning the valve. What now?
If it still leaks, the problem is likely with the hose coections, the hose itself, or the valve’s gasket. Make sure everything is tightened properly and that no parts are cracked or worn out. You might need to replace a hose or the valve.
Is it cheaper to clean the valve or replace it?
Cleaning is almost always cheaper. A new water inlet valve can cost anywhere from $20 to $75 depending on the model. Cleaning costs peies if you have basic household supplies. If cleaning doesn’t work, then replacement is the next step, but always try cleaning first.